Hello! In this article, we’ll be tackling MINDBODY Online to QuickBooks Online integration. We hope this answers any of the questions you might have about this particular integration.
Let’s go!
Here are some quick points to take note of:
- The integration is bi-directional, meaning you can integrate data to and from MINDBODY Online and QuickBooks Online.
- At the moment, only the online version of QuickBooks is supported for integration.
- You need to have an account in both MINDBODY Online and QuickBooks Online, both with records in them, for the integration to work.
- You must also have a SyncApps account. Sign up here to get one if you haven’t!
With that out of the way, let’s get to setting up your integration!

In SyncApps, we call integrations “Sync Profiles”. Your first step, then, is to set up your Sync Profile. Here’s how you do it:
- On your SyncApps Account’s main page, tap Sync Profiles and then Create New Sync Profile.
- Select MINDBODY Online to QuickBooks Online for the Sync Type.
- Give the Sync Profile a name that you can easily remember – something you can easily recall.
- In Step 1 of the Sync Profile Setup, enter your MINDBODY Online Site ID (the MINDBODY Site ID is the set of alphanumerics that comes after “?studioid=” in your MINDBODY URL).
- In Step 2, connect your QuickBooks Online account.
- In Step 3, set up your requirements for your integrations.
- In Step 4, which is the Advanced Settings, just enter the start date for the data you want to sync. (Currently, one-off data migrations are only possible with our Enterprise plans for syncing data going back multiple years from MINDBODY and QuickBooks Online via the API.)
- Step 5, schedule the sync anytime you want.
- Save your settings, and then press Sync Now to kickstart the integration.
Got it so far? If you have any questions about the steps, contact our 24/7 Support Team through [email protected] for suggestions and solutions.
Now, let’s get technical.
Multiple MINDBODY Locations
If you have multiple MINDBODY locations in your records and you only want to sync a selected few, you can do this in Step 1 of setting up your Sync Profile.
Just make sure that the spelling and capitalization of your MINDBODY location matches what you input in your Sync Profile, to avoid any errors.
Payments and Items Mapping for MINDBODY Online and QuickBooks Online
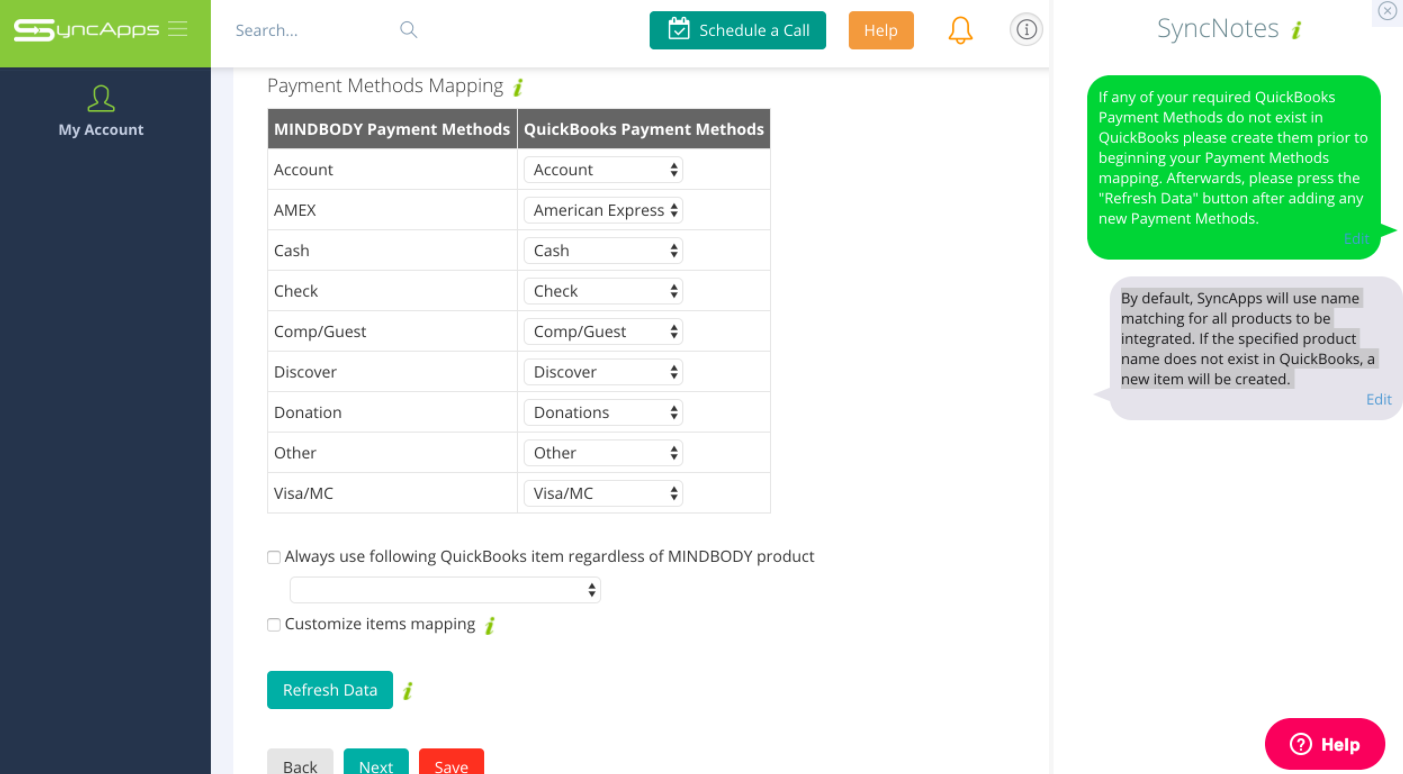
In Step 3 above, SyncApps will use name matching for all products being integrated. If the specified product name does not exist in QuickBooks, a new item will be created instead of records being married.
While Payments Mapping from MINDBODY is automatically pulled into the Step to start your matching process, if you do not have some payment methods in QuickBooks Online that need to be matched from MINDBODY then this needs to be set up first prior to integration per Payment Method in QuickBooks. Once you have set up each payment method you need in QuickBooks then head back to your setup to complete it.
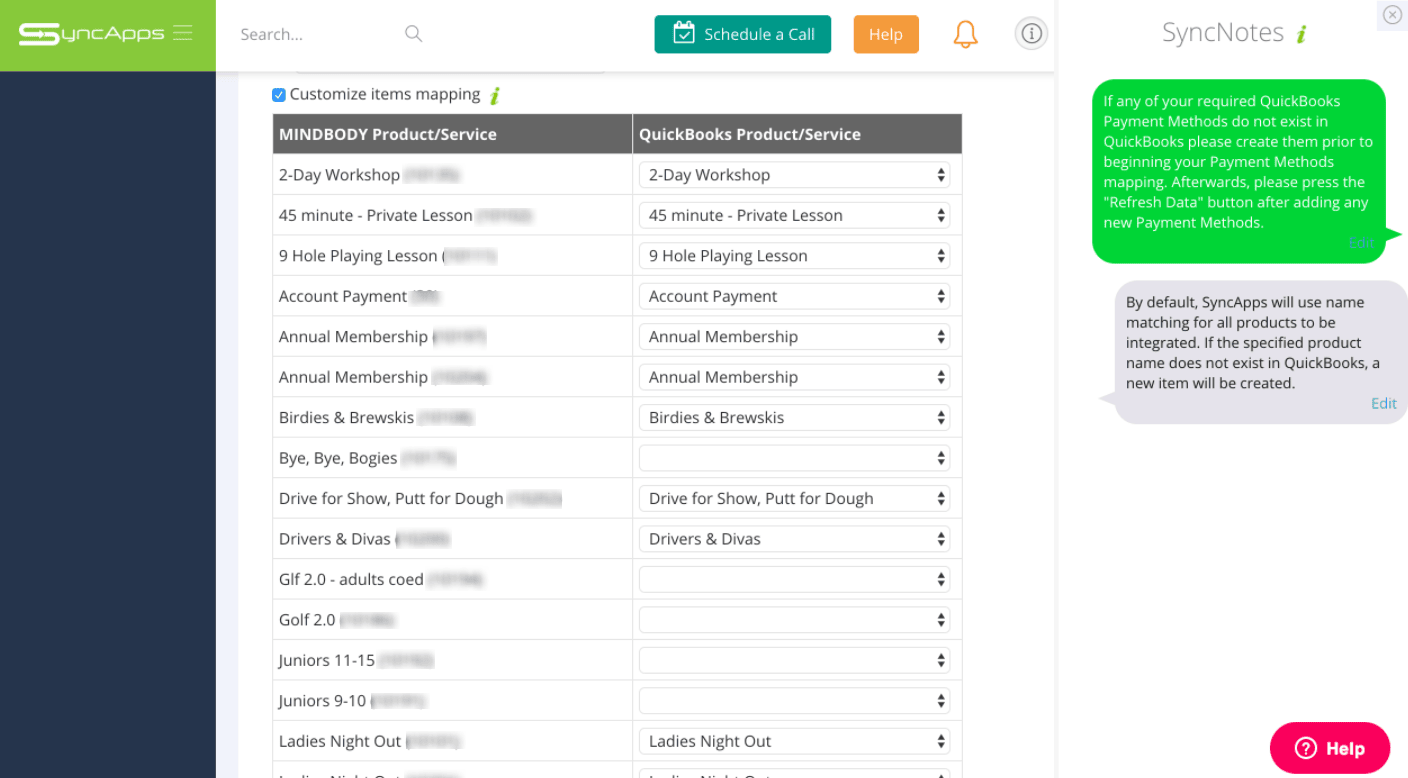
Items Mapping for MINDBODY Online to QuickBooks Online
By default, SyncApps item matching is by Product or Service name.
If you need to customize the Items Mapping you can do this in Step 3 of your Sync Profile setup. On the first Sync run or after a Sync Profile reset, SyncApps will do the rest for you and retrieve data updated after the specified date.
Migrating Records Based on Specific Date Criteria
If you need to migrate records starting from a certain date in MINDBODY Online to QuickBooks Online, you’ll need to contact our 24/7 Support Team. They’ll enable the Integration Start Date feature for you.
The Integration Start Date feature is commonly used for the following:
- On the first Sync of a newly created Sync Profile for historical syncing.
- On the reset of a Sync Profile, to specify which records should be integrated
- On Full Sync, where SyncApps will retrieve records since integration start date. This may cause many records to be deleted (previously synced all records but changing integration start date only retrieves part of them).
- On a regular Sync cycle, to retrieve records from the previous date.
After changing the integration start date, the user needs to Reset Sync Process for the integration if they want it enabled immediately.
Do note, however, that for MINDBODY Sales Syncs, once a record is successfully created QuickBooks Online, the same record will not be synced again.
And that’s it for now!
Did this article help you? Let us know your thoughts or ask us further questions through [email protected] today. We’d love to hear from you!