Salesforce has become one of the most popular CRM solutions available online which is used by millions of subscribers today. These subscribers, mostly business owners, big or small, make use of it to deal with their prospects and customers.
Salesforce CRM’s solution can enable you to create a customer-centered business starting from marketing to sales, business analysis and customer service. Called a Customer Success Platform as it gives you a more absolute understanding of your customers which can drive your business towards success.
Thought of giving Salesforce a try to see whether it could really move forward your business? Take a look at this cool way to use Salesforce with your website and our integrations.
Many of our subscribers use Salesforce so one of the questions that were asked recently to us with regards to using Salesforce with Cazoomi is how lead assignment rules work.
Here’s how you do it.
Set it up in Salesforce for new lead creation
Creation of lead assignment rule is already included in this pdf but to make it more convenient for you, we will just put it here.
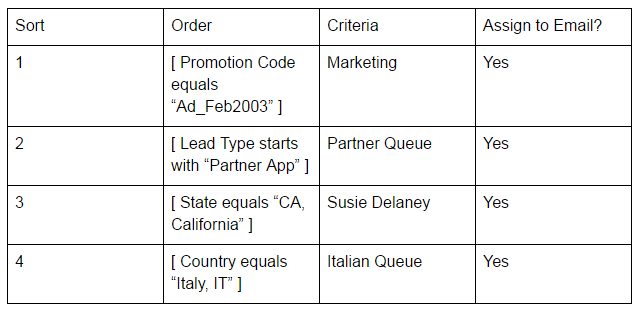
Creating Lead Assignment Rule
An assignment rule can consist of up to 3,000 rule entries, including 300 formula rule entries, which designate a lead assignee based on any lead criteria. For example, a rule entry can assign leads from people in western states to your West Coast sales rep. Another rule entry can assign all leads interested in a particular product to a queue of reps that know that product. Most companies only need one assignment rule, but during a holiday shutdown period or offsite meeting, you may want to temporarily switch to a different assignment rule. You can create several assignment rules, but only one can be active at a time.
To create a lead assignment rule:
- From Setup, enter Assignment Rules in the Quick Find box, then select Lead Assignment Rules
- Click New
- Enter the name of the rule
- Select Set this as the active lead assignment rule to activate the rule immediately
- Click Save
- Click the name of the rule you just created
- Click New in the Rule Entries section
- Enter an order number that tells Salesforce when to fire the rule entry in relation to other rule entries
- Select the criteria that determine what attributes the lead must have before Salesforce apply the rule entry
- Choose the user or queue to be the assignee if the criteria is met
- Choose a notification template to be used when sending an email to the new lead owner
- Click Save.
Leads are processed through the rule entries in order until a match is found amongst the lead and the rule entry criteria. When Salesforce finds a match, it assigns the lead.
Examples of lead assignment rules:
Sync lead source from website
And when to sync lead source from a website, all you need to do is just land the records into your Marketing Automation Solution’s Master List. Use our static text mapping when needed.
To accomplish this task, our Cazoomi team will need to enable the “static text mapping” option for your SyncApps. Then you will be able to label leads flowing from each Sync Profile “Master List” to Salesforce.
When a new lead signs up from your site, it will automatically land in the Marketing Automation Solution, in this case the Sync Profile “Master List”. You are all set as “From Email Landing Page Forms” will be mapped to their Salesforce CRM record on the sync.
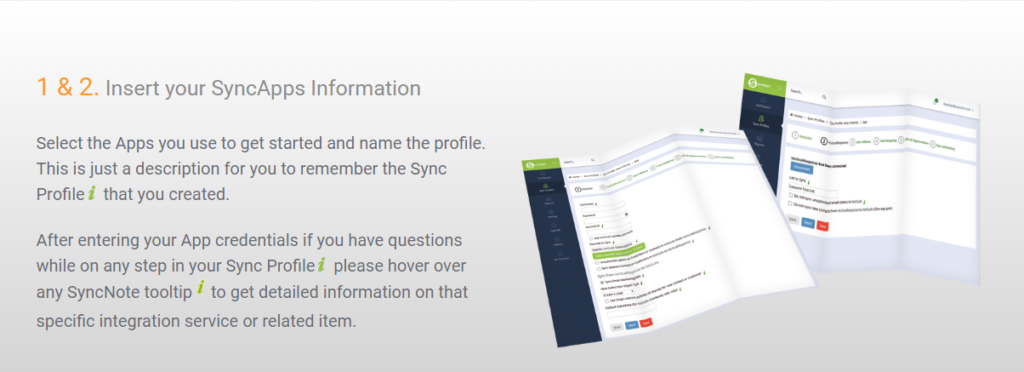
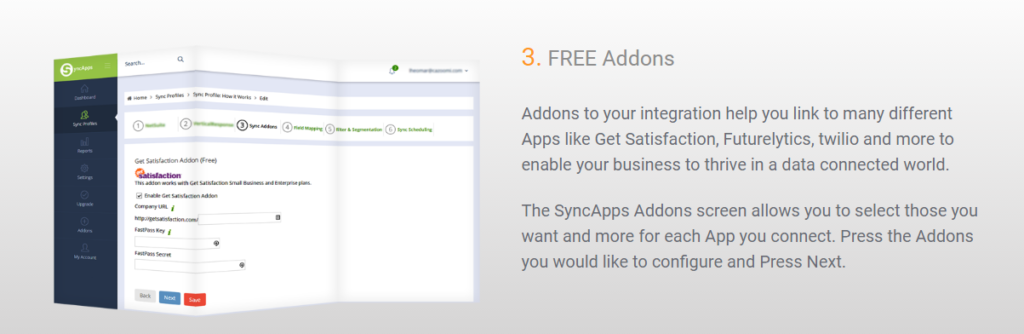
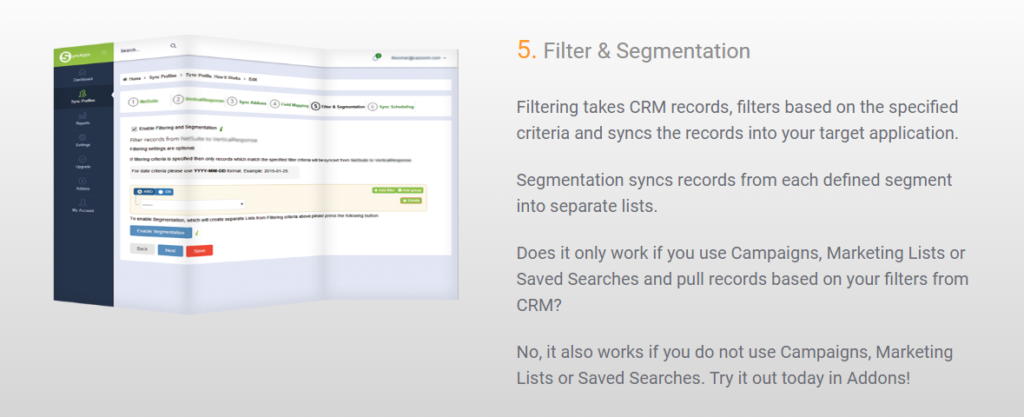
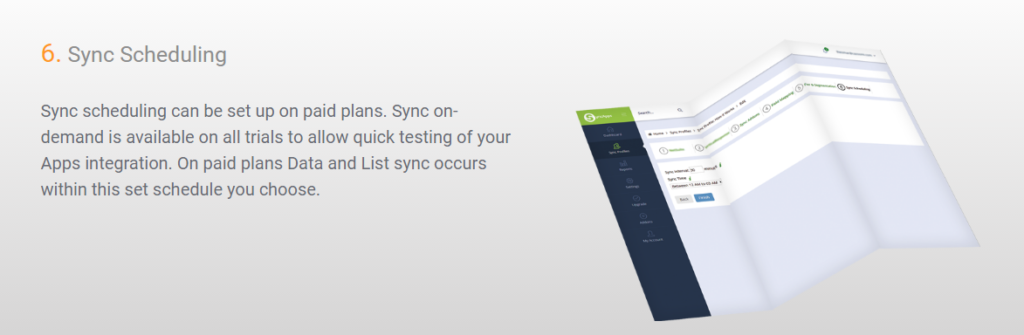
And to guide you through SyncApps, here’s how it works.