The Salesforce-to-Mailchimp integration is a heavy-hitter in terms of organizing records – you can sync up hundreds to thousands to millions of records in one go, as fits your needs, with a few clicks. Here at SyncApps, we push the integration further with advanced segmentation through Multi-Groups.

Multi-Groups work like this: it syncs up your records from Salesforce to various Group Titles under your Audience in Mailchimp instead of just one Group Title in Mailchimp today. With Multi-Groups, instead of all of your records falling under the same default Group you name in Step 2 of your integration, you can further segment them into specific Groups so your records are organized just like you have them in Mailchimp today.
Here’s how to get it set up.
First, go to your dashboard and create a Sync Profile, then choose the Multi-Group feature in Step 1 of your setup.
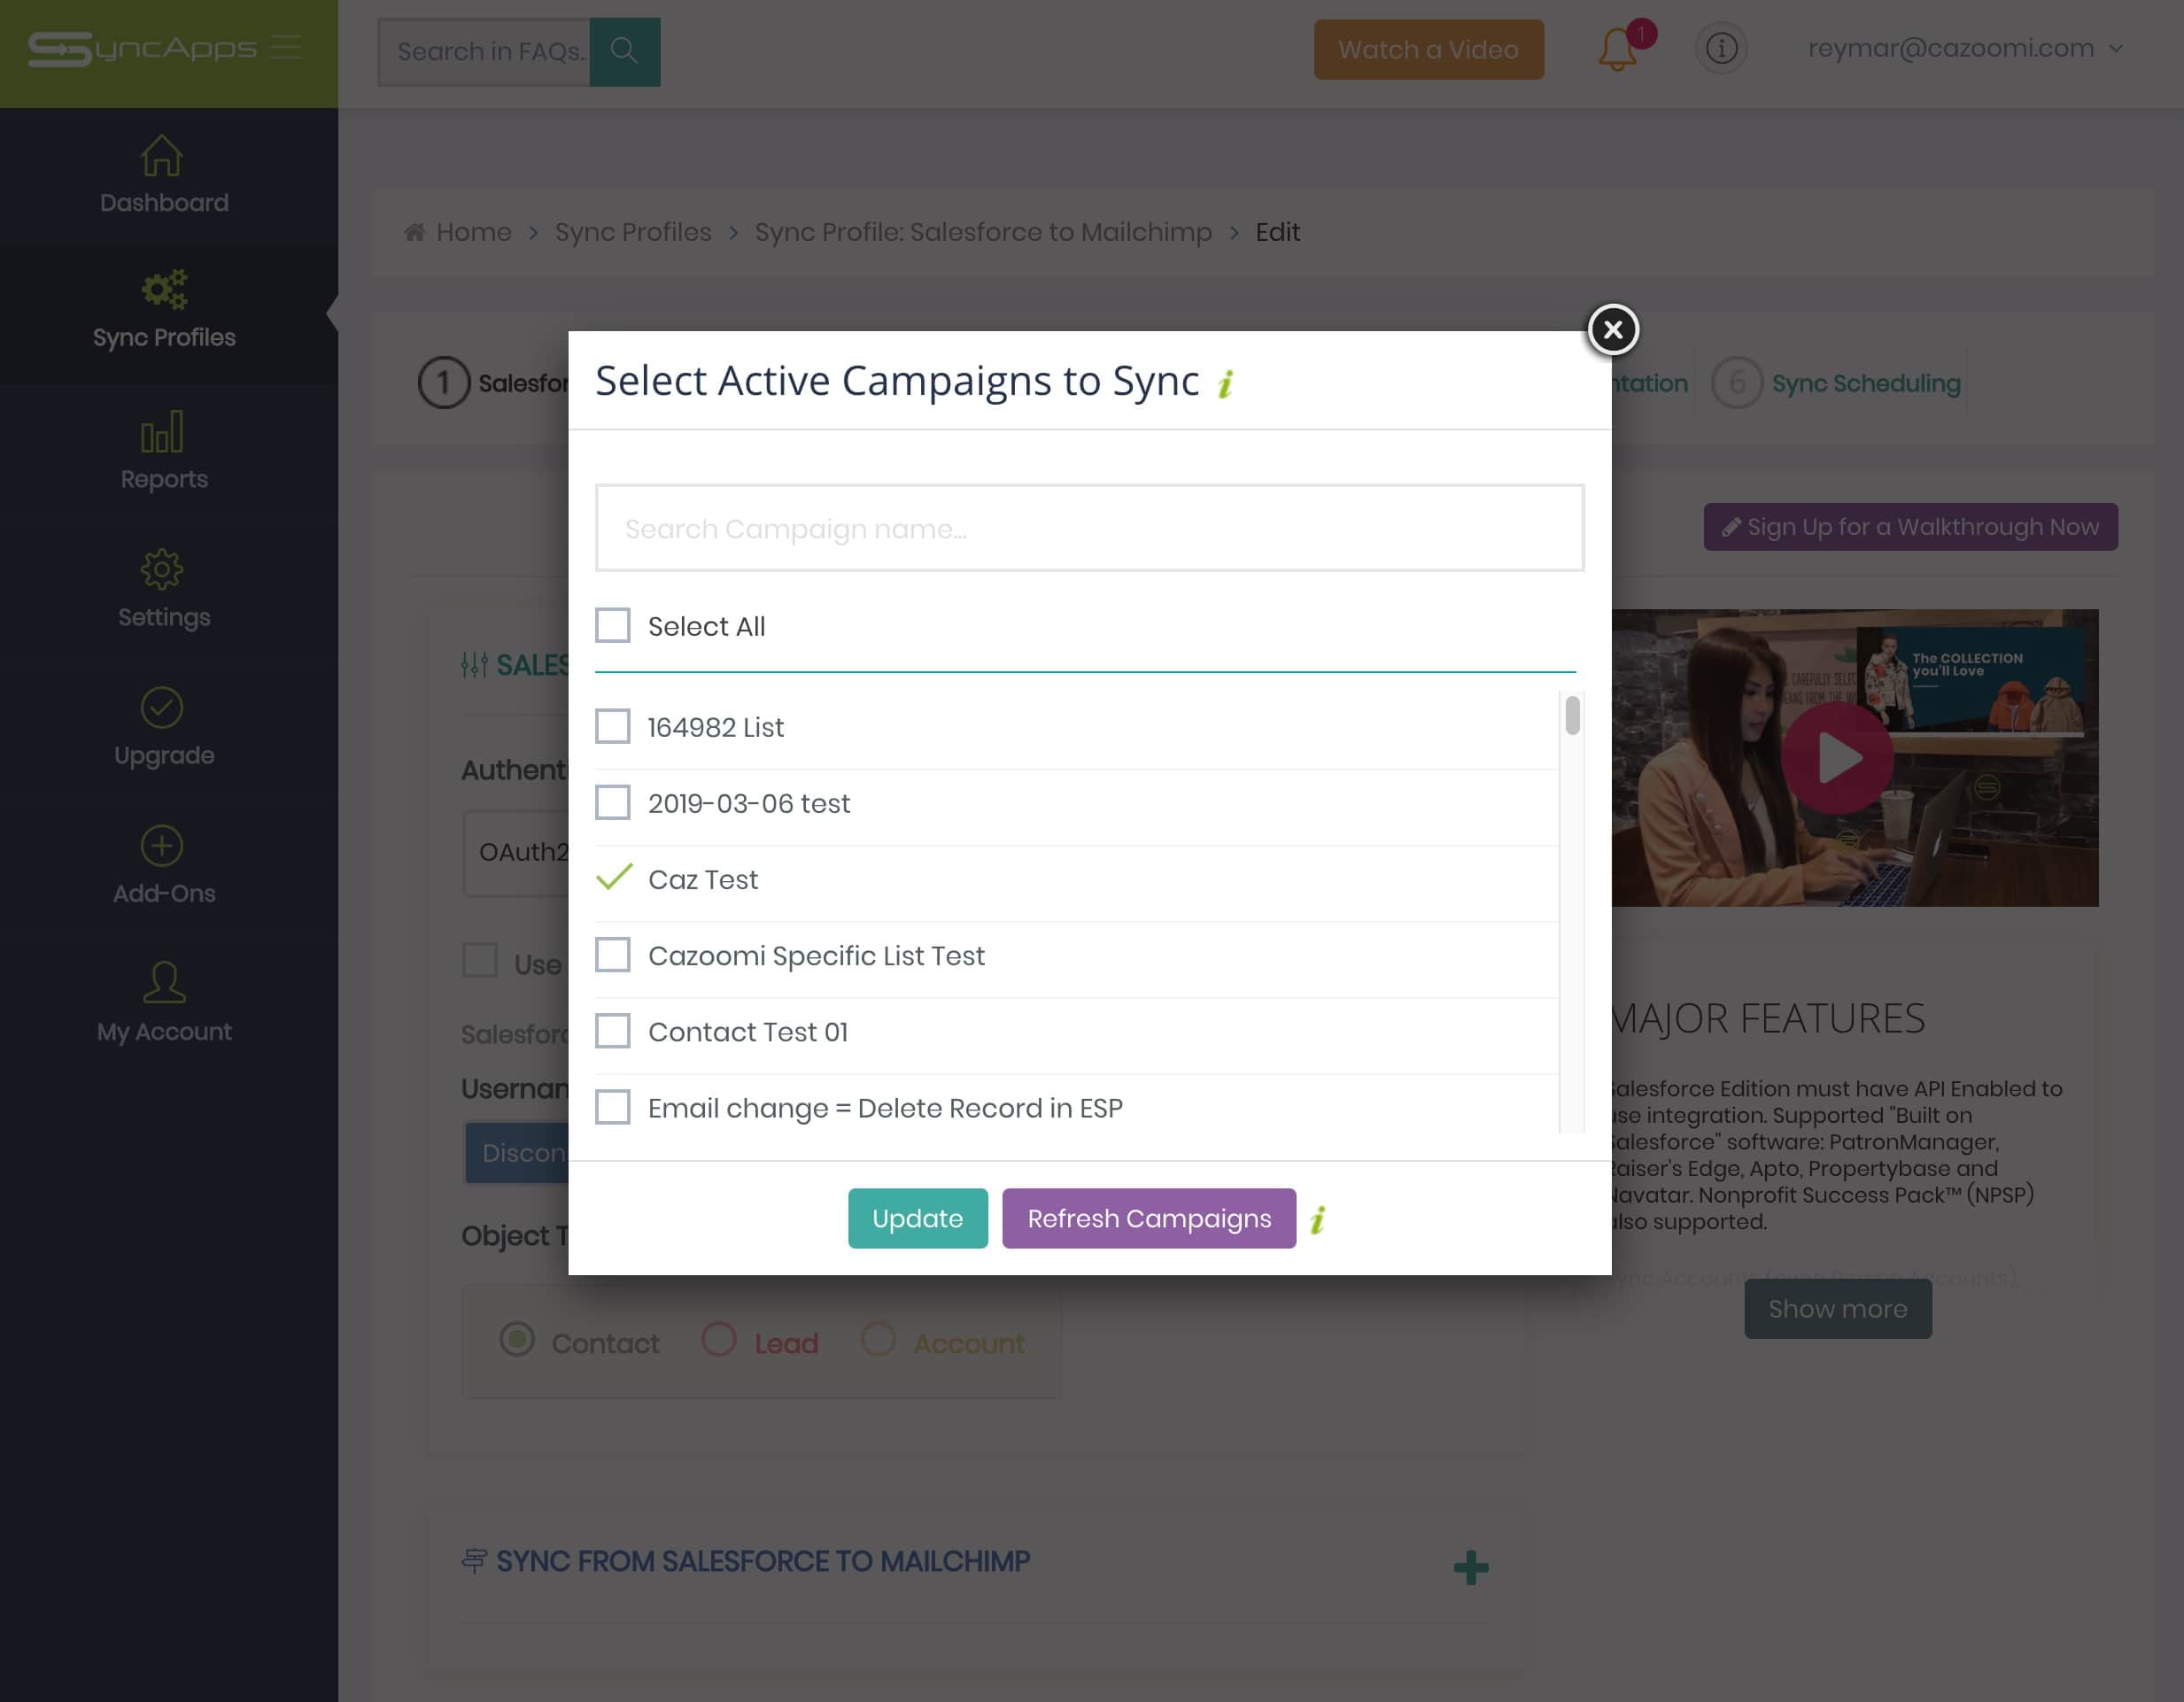
Select the Sync Salesforce Campaign/List Members to Mailchimp Group in Step 1 of setting up your SyncApps Sync Profile. Next, select the Salesforce Campaigns by clicking the browse button. Make sure that the Campaigns you’ve selected are active and contains at least 1 Contact Record each; the process won’t work correctly if these two requirements aren’t met.
Once you’ve selected the Campaigns you want to integrate, we can move on to the next step: updating the settings. This is easy – simply tap the Update button to confirm the new settings and then the Next button to save it.
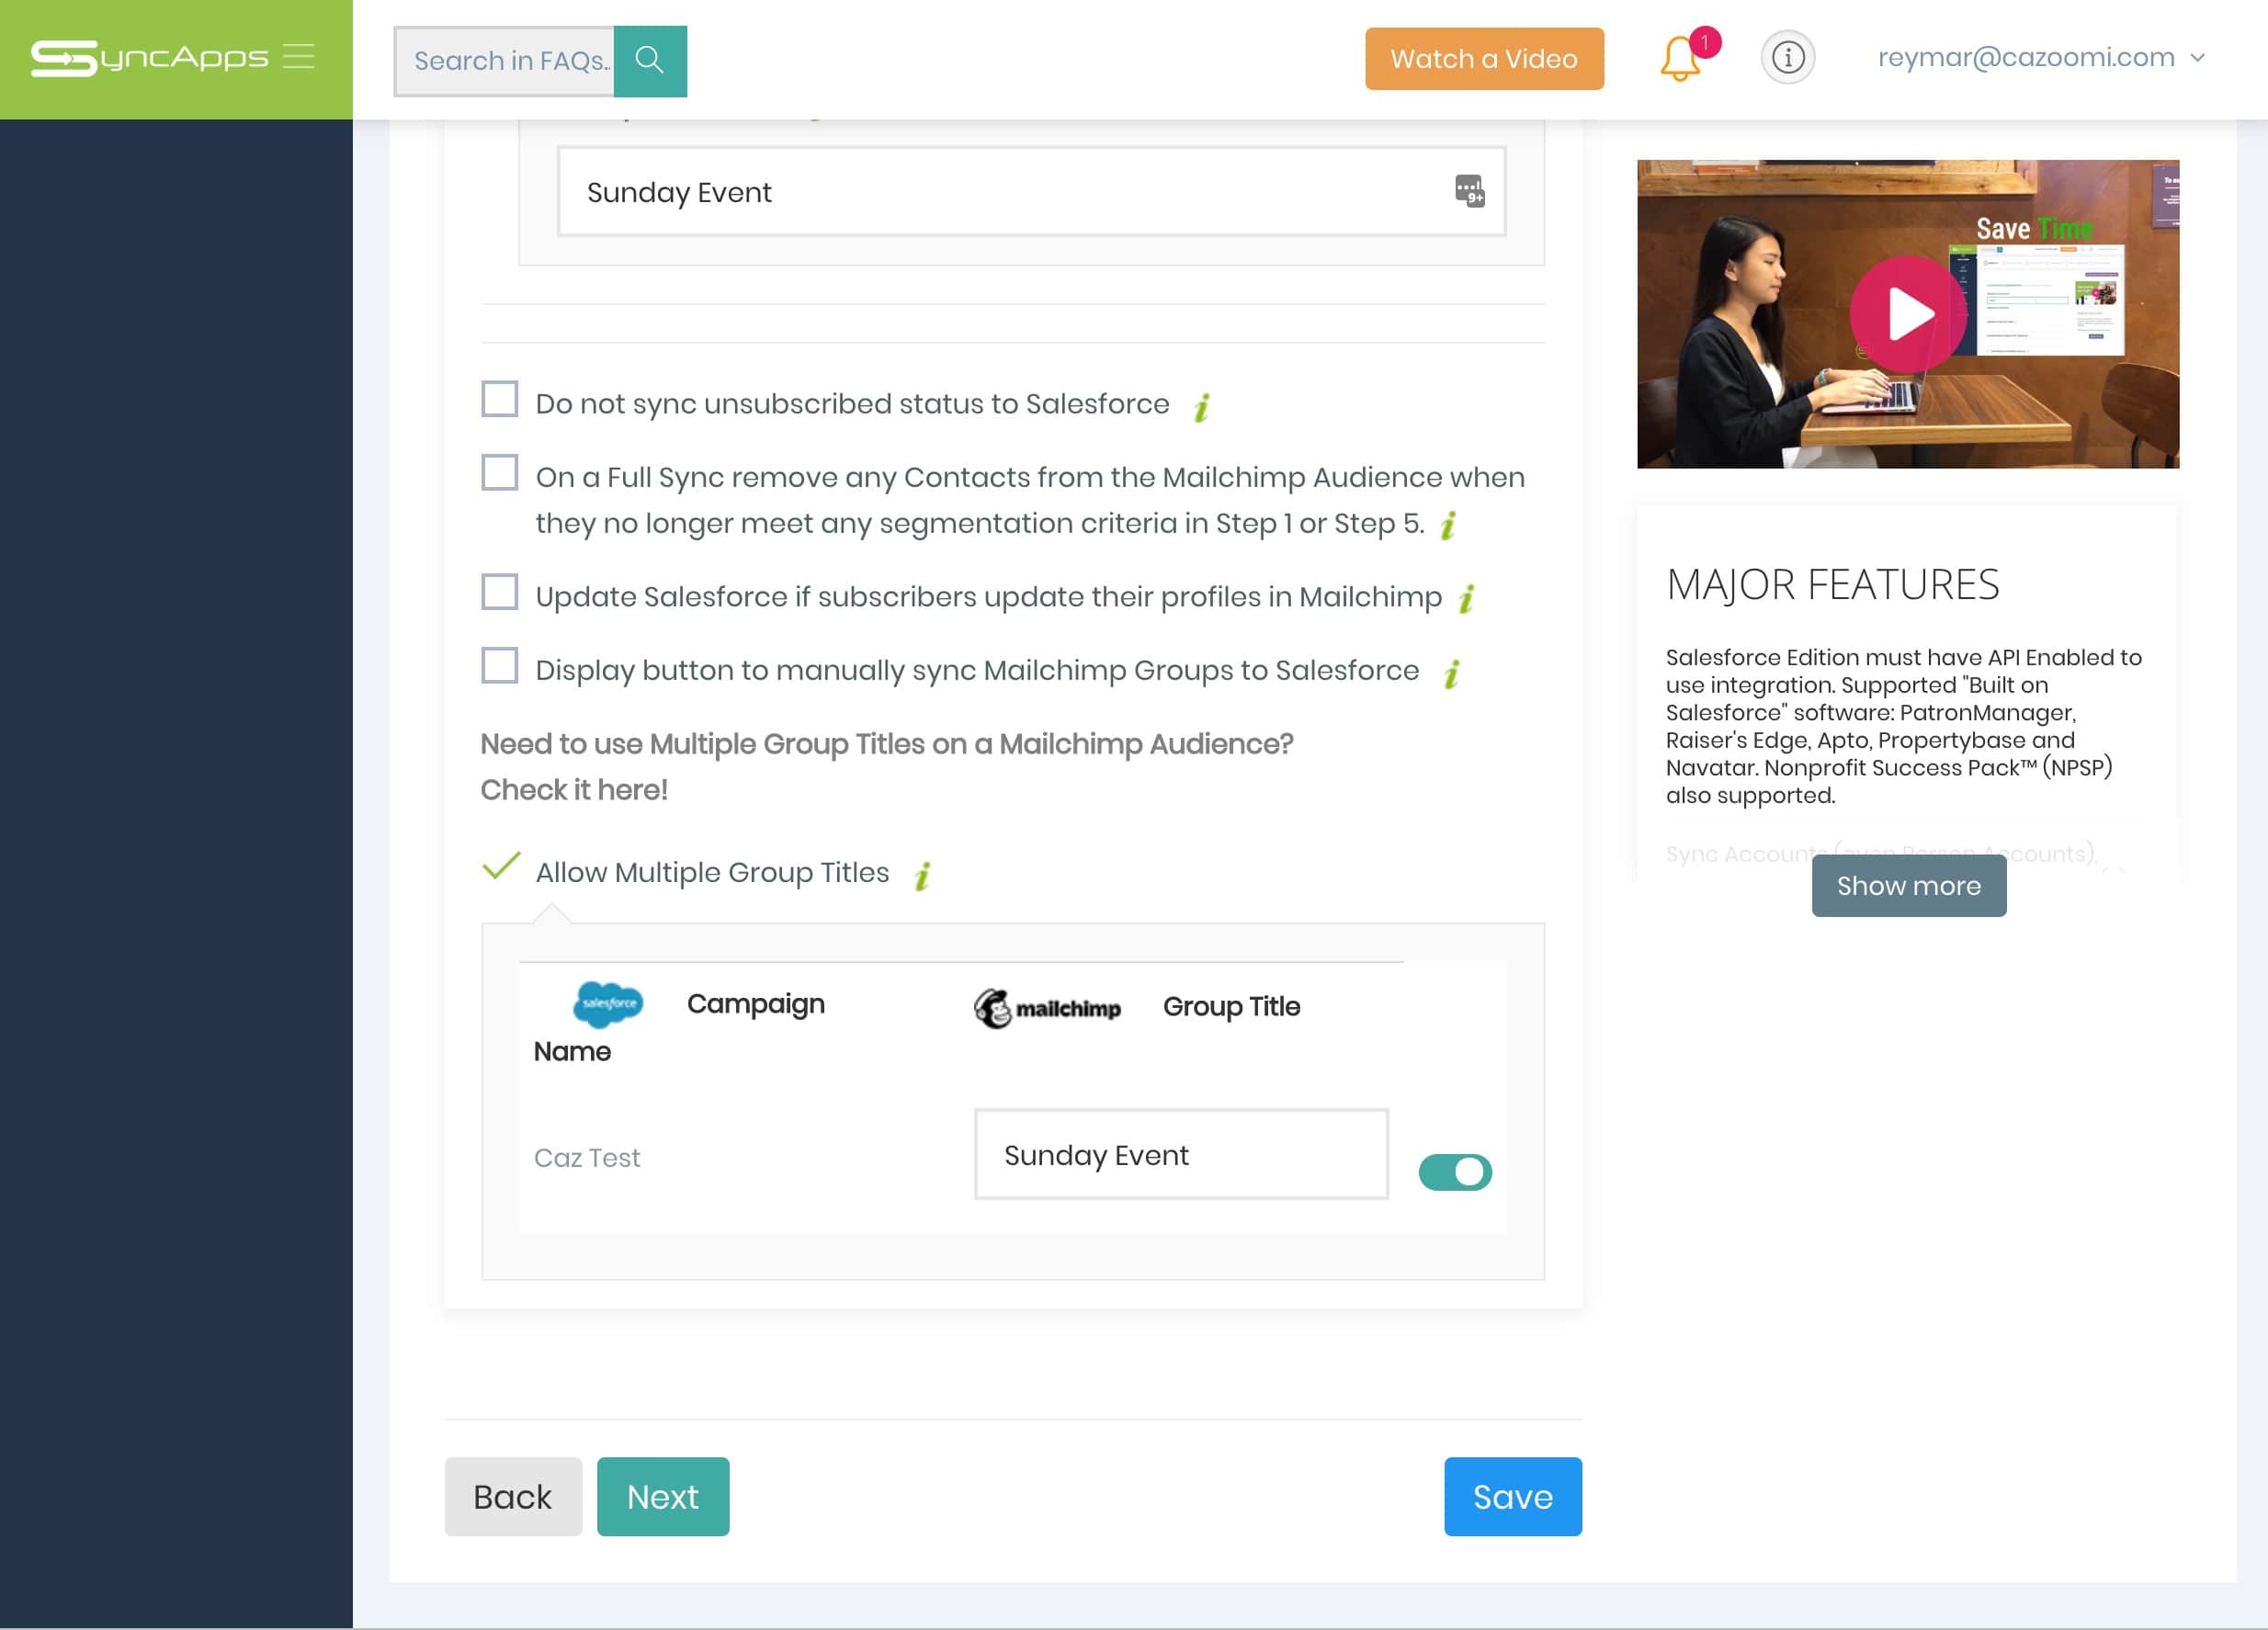
Proceed as usual with Step 2. If the settings have saved correctly, an option should show up called “Allow Multiple Group Titles”.
Your selected Safesforce Campaigns should show up in Step 2. If you look under “Allow Multiple Group Titles”, you’ll notice that there’s now a Mailchimp Group Title option, with toggles.
For each Campaign, you can set the Group Title you want them to fall under in Mailchimp. For example, if you want Campaign A and Campaign B to sync over under the Group Title “Sunday Event”, make sure that you put “Sunday Event” in the Mailchimp Group Title field corresponding to Campaign A and Campaign B.
A similar process applies for the rest of your Salesforce Campaigns; simply set the Group Titles in the Group Title field for each Campaign.
Be careful though – if you’re grouping more than one Salesforce Campaign under the same Mailchimp Group Title, make sure that the Group Title is typed exactly the same for the Salesforce Campaigns you’ve chosen for that Group Title.
Spelling and capitalization matter; if the Group Titles don’t match exactly, SyncApps will create separate Groups based on the variants instead of just one unified group, and you’ll have to do the Sync process all over again.
If you’re satisfied with the Groups you’ve set, you can hit the Save button to save the settings, and hit the Reset Sync Process to implement the changes.
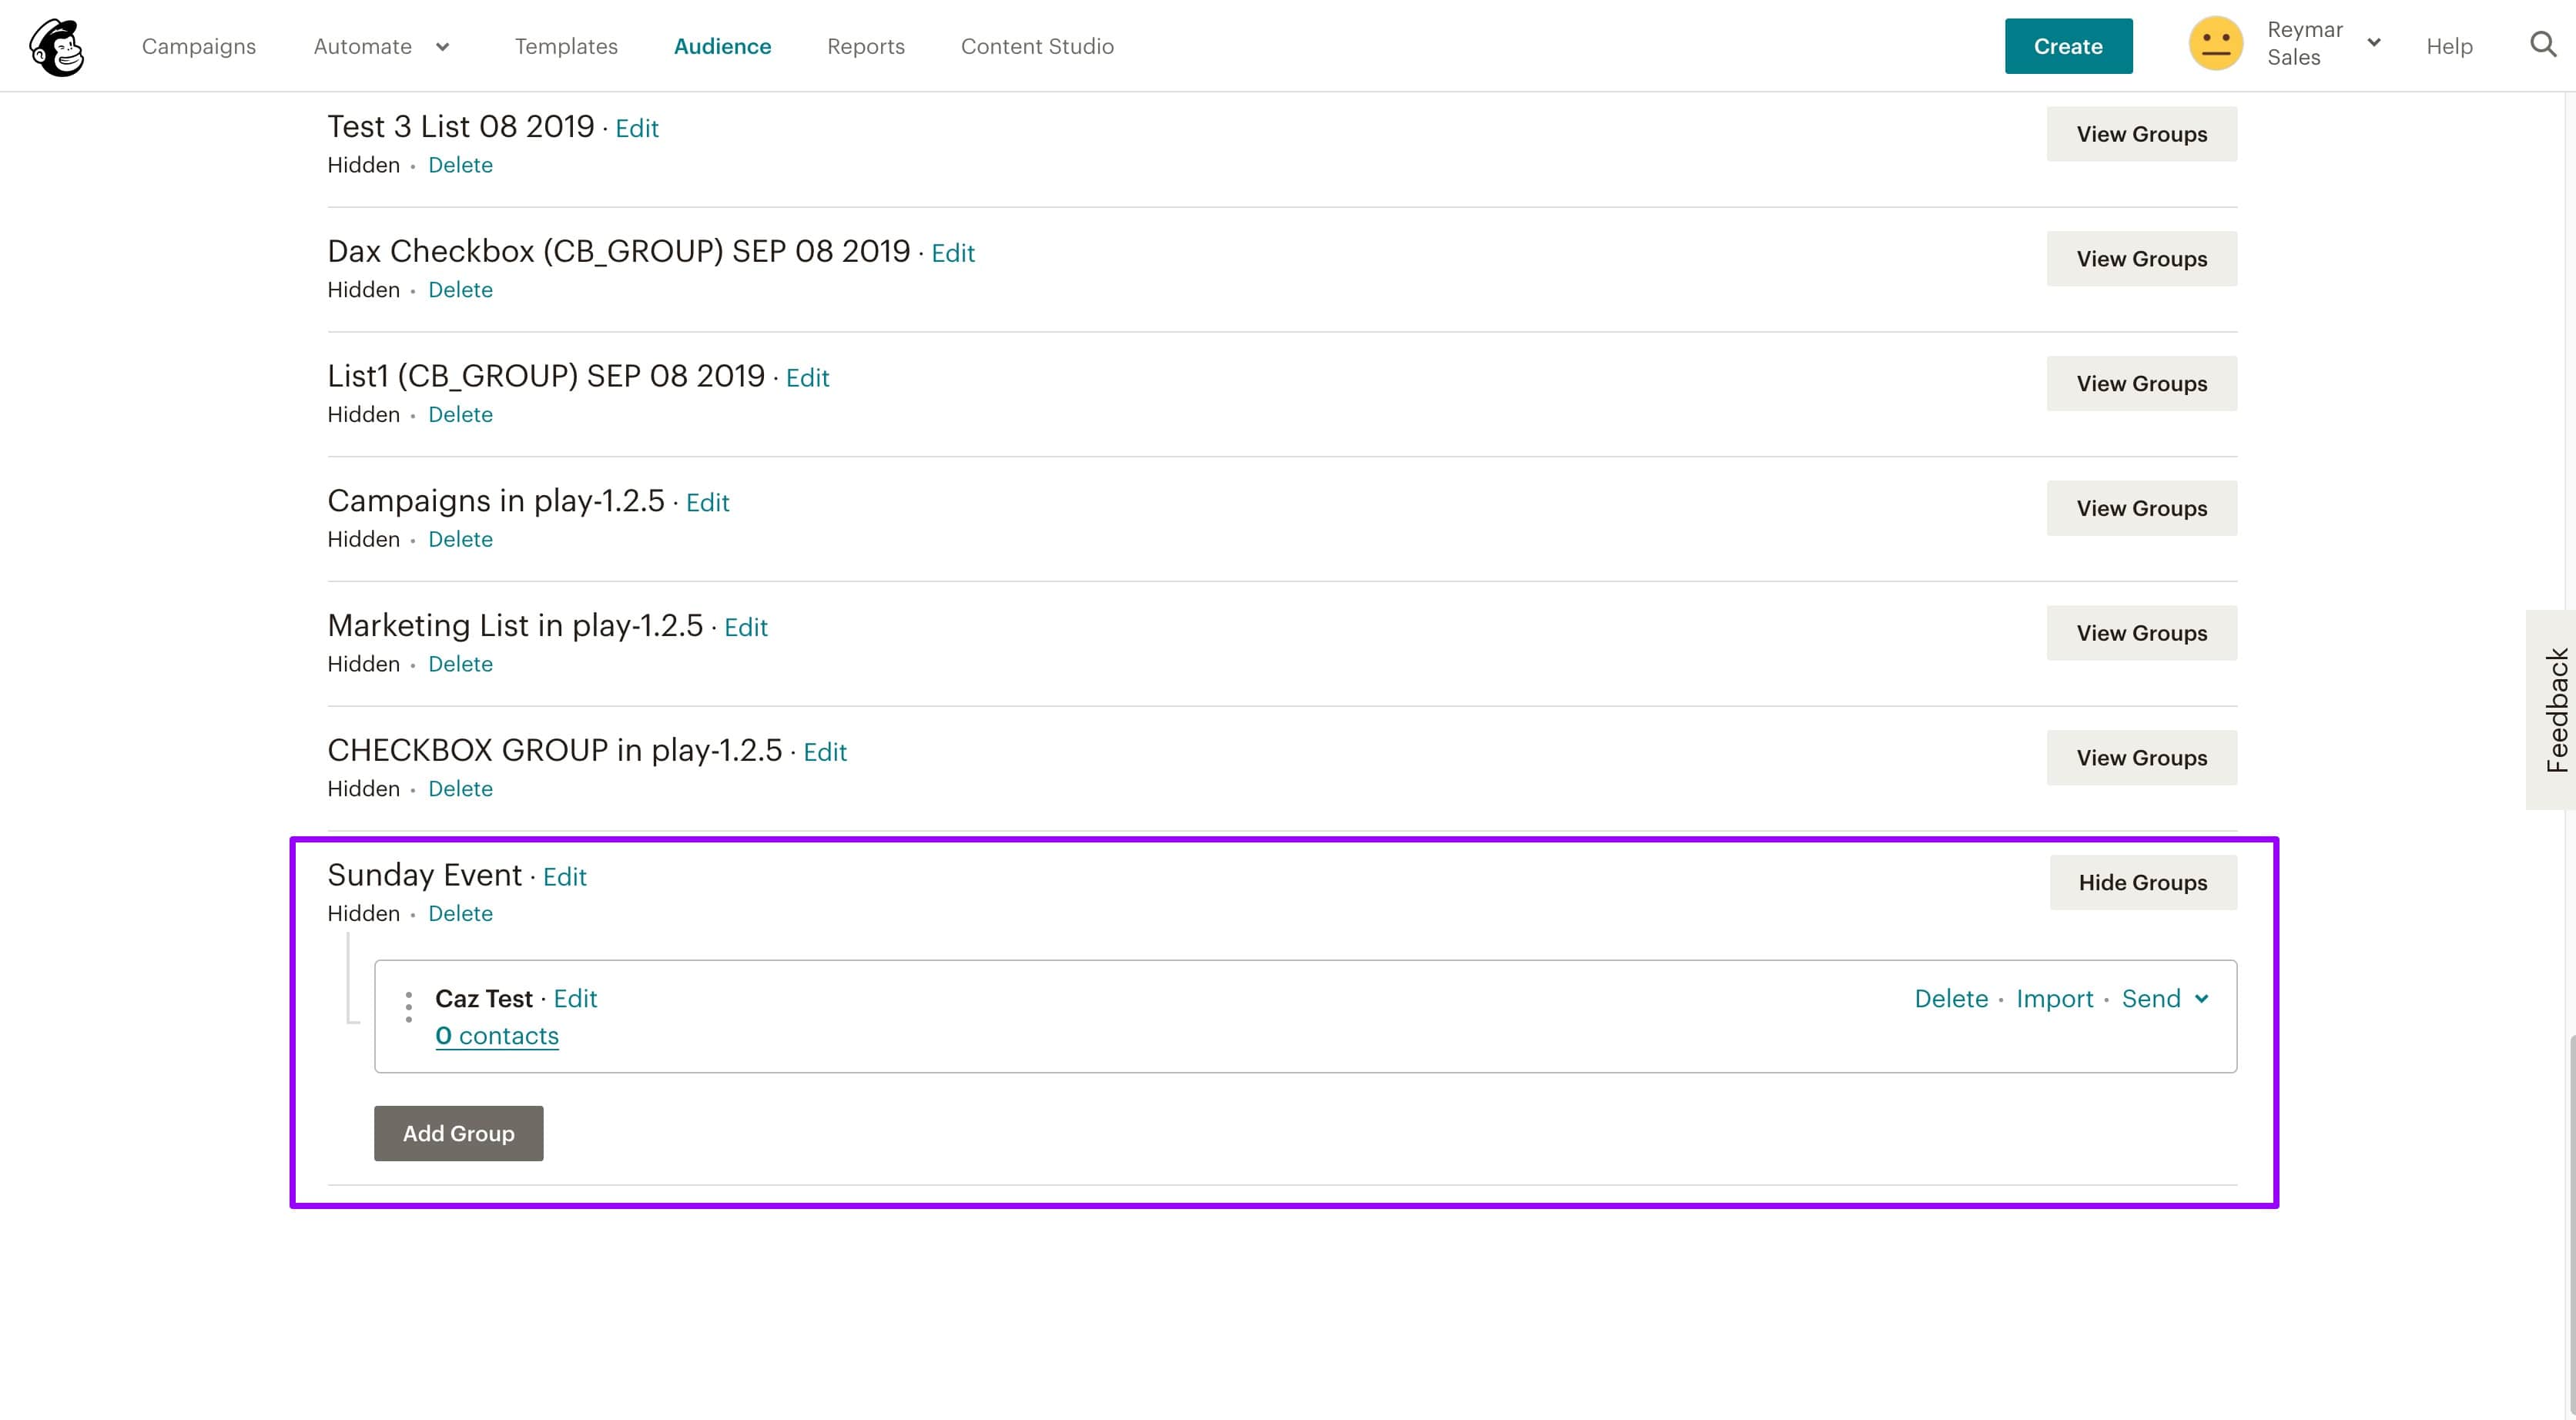
And you’re done! Your Salesforce Campaign records should show up in Mailchimp grouped according to the Group Titles you’ve set.
A caveat: currently, the Multi-Groups feature is a One-Way Sync. Specifically, it syncs up records from Salesforce to Mailchimp only. If new records are added to Mailchimp’s Audience and you want to sync them up with Salesforce under specific Campaigns, the records will fall under the Contacts/Leads, ungrouped, and you’ll have to manually sort the Contacts or Leads into their respective Campaigns.
Don’t worry, however. We’re already working on getting the Multi-Groups feature to work bidirectionally, so keep an eye out for the announcement in the future.
Do you have more questions about getting your Multi-Groups set up? Get in touch with us through our 24/7 Support Team at [email protected] today. We’d love to hear from you!